


Credit: Mojang/Microsoft
While the bedrock of Minecraft (ba-dum-tish) lay in the creation of physical constructs, that’s not the only kind of crafting available in this sprawling creative sandbox. For one thing, considering the abundance of bizarre raw materials, the world of Minecraft is absolutely rife with potential for some old-fashioned apothecary work, i.e. creating potions. Read on for our potion guide for Minecraft.
Minecraft Potion Guide
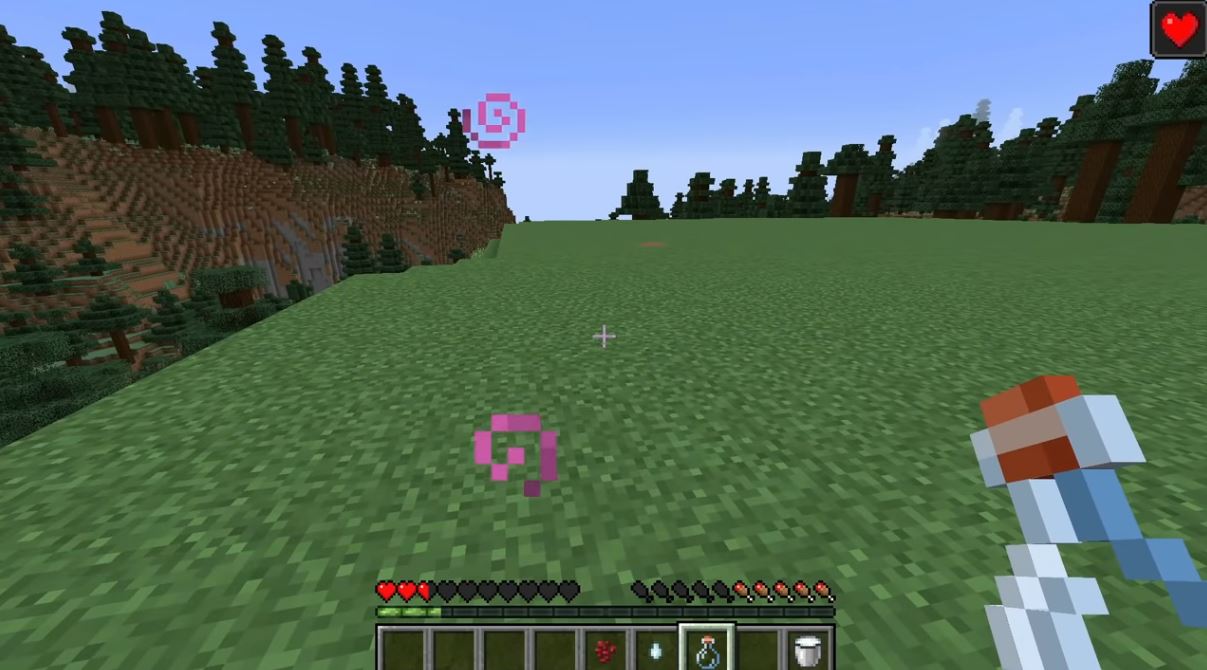
Potions in Minecraft are… well, exactly what they sound like. They’re consumable items that, when either drunk or thrown, produce some manner of magical effect. There are potions for all kinds of practical purposes, like restoring your health or increasing your running speed, as well as more abstract applications like falling slower, seeing in the dark, or breathing underwater. You can also utilize potions as potent ranged weapons that explode into clouds of poison or caustic ichor when lobbed at an unsuspecting foe.
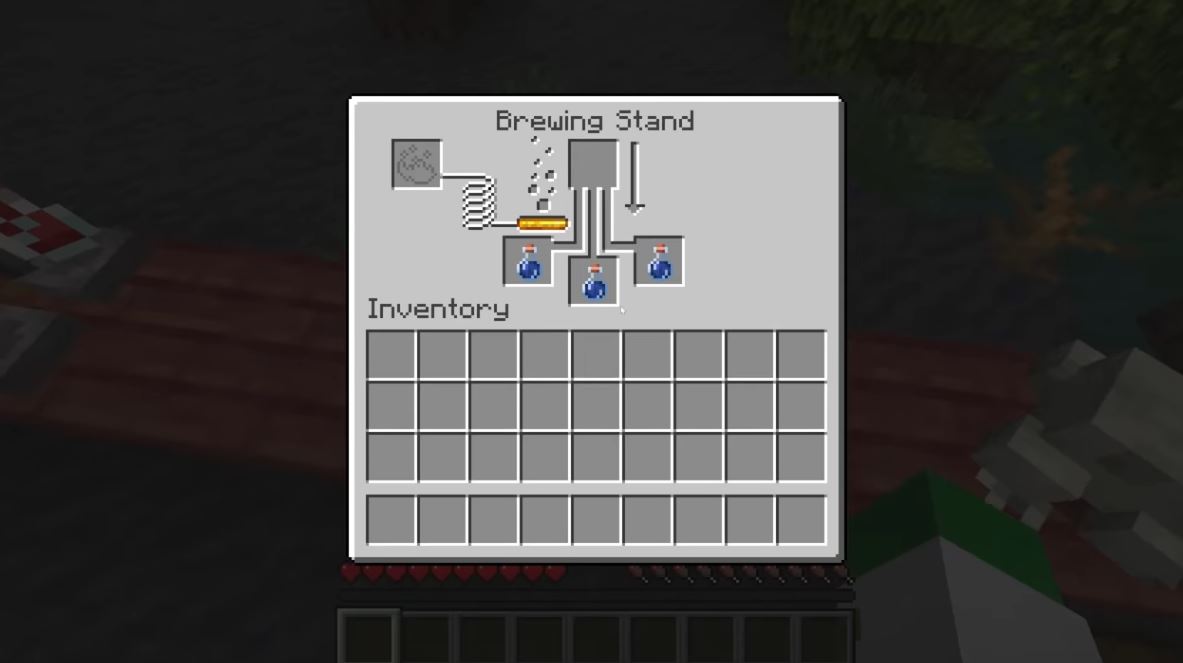
Before you can create your own potions, though, you need the tools to do so. Specifically, you need a Brewing Stand. This alchemical device boils down ingredients into their magical elements and pumps them into prepared glass bottles. Just load your ingredients and bottles, let it percolate for a while, and voila, a potion!
To make a Brewing Stand, you’ll need the following items:
- 1 Blaze Rod: Dropped by Blazes found in Nether Fortresses
- 3 Rock Blocks: Regular ol’ rock blocks, any kind is fine
- Blaze Powder: Created by crafting a Blaze Rod
You’ll also need at least one Water Bottle, which you can get by filling a Glass Bottle from a water source block or a Cauldron. To assemble the Brewing Stand, just open a Crafting Table, place the Blaze Rod in the center cell, and the three Rock Blocks in the three slots beneath. Once you’ve set up your Brewing Stand, you’ll then need to deposit a stack of Blaze Powder in the top-left slot to power it.
Potion Ingredients and Brewing
Credit: Mojang/Microsoft
Now that you’re ready to brew potions, let’s talk about ingredients. Brewing potions is generally a two-step process, requiring specific ingredients to determine the potion’s purpose and effect. You can’t just shove an old loaf of bread in the brewing slot and expect to make a potion; there are rules to this.
Firstly, you need to create a potion base. This determines how the potion will function. To do this, all you have to do is stick a Water Bottle in one of the Brewing Stand’s three bottle slots, then stick a specific ingredient in the ingredient slot up top. There are six kinds of base ingredients that create different base potions:
- Nether Wart: Creates an Awkward Potion, used as a base for most potions
- Redstone Dust: Used on an Awkward potion to make a Mundane Potion, which makes its effect last longer
- Glowstone Dust: Used on an Awkward potion to make a Thick Potion, which makes its effect more potent
- Fermented Spider Eye: Can be used with potions to reverse positive effects into negative ones, or can be used on its own to create a Potion of Weakness, which reduces melee damage
- Gunpowder: Used on a potion to change it to a Splash Potion, which is thrown instead of drunk
- Dragon’s Breath: Used on a Splash Potion to upgrade it to a Lingering Potion, which leaves a cloud of its effect when thrown
Once you’ve created a base potion, the next step is to use a different set of ingredients to add an effect. Just place the base potion in the Brewing Stand’s potion slot again, put the effect ingredient in the top slot, and let it work its magic. There are eleven kinds of effect ingredients, each producing a different potion type, five of which can be reversed with a Fermented Spider Eye to achieve a different effect. The effect ingredients are:
- Sugar: Used for a Potion of Swiftness, enhancing your movement speed for a brief time
- Rabbit’s Foot: Used for a Potion of Leaping, enhancing your jump height for a brief time
- Glistering Melon Slice: Used for a Potion of Healing, restoring your health right after it’s consumed
- Spider Eye: Used for a Potion of Poison, inflicting damage over time on anyone who drinks/is splashed by it
- Pufferfish: Used for a Potion of Water Breathing, which protects you from drowning while underwater
- Magma Cream: Used for a Potion of Fire Resistance, which makes you immune to both mob and environmental fire damage
- Golden Carrot: Used for a Potion of Night Vision, which makes it easier for you to see in dark places
- Blaze Powder: Used for a Potion of Strength, which increases the damage of your melee attacks
- Ghast Tear: Used for a Potion of Regeneration, which slowly restores lost health over time
- Turtle Shell: Used for a Potion of the Turtle Master, which slows your movement, but increases your resistance to damage
- Phantom Membrane: Used for a Potion of Slow Falling, which slows the rate at which you fall from high places, removing fall damage
Here are the potions you can make with a Fermented Spider Eye:
- Fermented Spider Eye+Potion of Swiftness or Leaping: Creates a Potion of Slowness, which reduces movement speed
- Fermented Spider Eye+Potion of Healing or Poison: Creates a Potion of Harming, which deals instant damage to those who drink it/are splashed by it
- Fermented Spider Eye+Potion of Night Vision: Creates a Potion of Invisibility, making the drinker invisible and nearly undetectable by mobs
Remember, regular Potions are consumed by using them from inventory for several seconds, while Spalsh Potions are instantly thrown, applying their effect on whatever they hit. If you’re making a weaponized Potion with a damage or debuff, don’t forget to turn it into a Splash Potion so you don’t accidentally drink it yourself! Though, if you’re playing with friends, you can also make beneficial Splash Potions to bestow buffs on them if you don’t have time to physically pass a normal Potion to them.
Potions are a very handy tool for exploring dangerous territory, as their various beneficial effects can go a long way toward enhancing your overall survivability, not to mention attacking dangerous foes without needing to get right in front of them.